Difference between revisions of "User Manual"
Microseven (talk | contribs) |
Microseven (talk | contribs) |
||
| Line 101: | Line 101: | ||
|M7NVR-4K16CH | |M7NVR-4K16CH | ||
|} | |} | ||
| − | |||
6. Click the ‘Download Now’ button next to the camera’s appropriate device type. This will automatically download a setup file with a .pkg extension into your local Download folder.<blockquote> | 6. Click the ‘Download Now’ button next to the camera’s appropriate device type. This will automatically download a setup file with a .pkg extension into your local Download folder.<blockquote> | ||
Revision as of 02:19, 2 January 2021
System Installation
Basic System Requirements
To ensure proper system performance, Microseven requires Microsoft Windows 7 or above and an Intel Core i3 or a faster multi-core processor.
Software and Firmware Upgrade
Obtaining the Latest Software and Firmware
Microseven enhances features and functionality through regular firmware and software updates. To take advantage of the newest enhancements, it is important to upgrade your camera(s) with the latest firmware and software available. This section presents the steps for downloading setup files onto your local system. The setup files contain installers that will upgrade your system with the latest camera software.
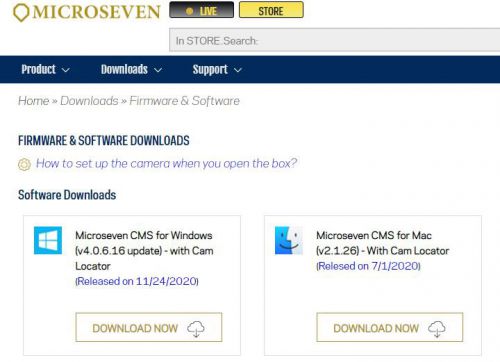
1. Go to Microseven’s download site located at https://www.microseven.com/myaccount/download.html
2. Locate the “Software Downloads” section.
3. Click the ‘Download Now’ button. This will automatically download a file with the .exe extension (Windows) or .dmg extension (Mac) into your local Download folder.
Note: Clicking the hyperlink text will open a “What’s New” web page containing change log information for all revisions.
4. Locate the “Firmware Downloads” section on Microseven’s download site.
5. Determine the device type associated with your camera model as shown in the following table.
| Resolution | Firmware Name | Camera Model |
|---|---|---|
| 5MP (2592x1944) | MYM75MP-HX-PTZV20X | M7D5MP-PTZV20X-POESAA |
| 5MP (2592X1944) | MYM75MP-HX | M7B5MP-SWSAA; M7D5MP-POESAA |
| 5MP (2592X1944) | MYM75MP-HX-VB | M7B5MP-WPSAA; M7B5MP-WSAA; M7B5MP-PSAA |
| 5MP (2592X1944) | MYM75MP-HX-NS-VB | M7B5MP-POESA; M7D5MP-POESA |
| 5MP (2592X1944) | MYM75MP | [old version hardware, discontiuned]
M7B5MP-POE; M7D5MP-POE |
| 1080P | MYM71080i-A-PTZ20X | M7D77-PTZV20X-WPSAA |
| 1080P | MYM71080i-A-PTZ20XS | M7D77-PTZV20XS-WPSAA |
| 1080P | MYM71080i-A-WDR | M7B77-WDRSWSAA; M7B77-WDRPOESAA |
| 1080P | MYM71080i-A-MIC | M7B77-SWSAA; M7B77-POEAA; M7B77-SWSA |
| 1080P | MYM71080i-A | M7B77-WPS (v2); M7B77-WPSV (v2); M7B77-WPSV1 (v2);
M7B77-POE |
| 1080P | MYM71080i-B | M7D77-POE; M7D77-UAKRON |
| 1080P | MYM71080i | [old version hardware]
M7B77-WPS (v1); M7B77-WPSV (v1); M7B77-WPSV1 (v1) |
| 1080P | MYM71080i-INDOOR | M7D77-PTZ3X-CR |
| 960P | MYM7i | M7B15; M7D12; M7B37-W; M7B37-WE; M7B57-WPS;
M7B77-WPSE; M7B77-SWS; M7B57-WPSE; M7B15POE-HOME |
| 960P | MYM7 | [old version hardware]
M7B15; M7D12; M7B57-WPS |
| 8CH | makemake_xi-MicroSeven-2.0b1 | M7NVR-4K08CHPOE; M7NVR-4K08CH |
| 16CH | makemake_xi-MicroSeven-2.0b1 | M7NVR-4K16CH |
6. Click the ‘Download Now’ button next to the camera’s appropriate device type. This will automatically download a setup file with a .pkg extension into your local Download folder.
Important: Installing an incompatible version of firmware may render your camera inoperable. If you have any questions regarding the firmware version or your camera’s device type, please contact Microseven support at support[at]microseven.com prior to installing the firmware.
Installing or Upgrading Microseven Software
This section describes how to install or upgrade Microseven camera software including the Cam Locator and Microseven Camera Management System (M7CMS) onto your local system. The Cam Locator is used to establish initial camera settings and M7CMS is used to configure advanced camera options and features.
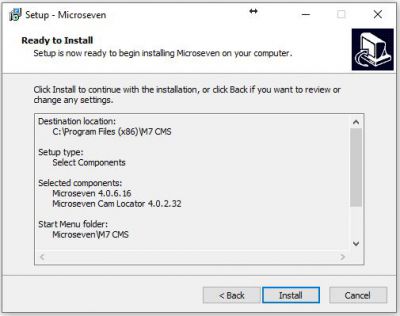
Microseven software is installed or upgraded in two basic steps. The first step involves running a setup file (*.exe or *.dmg) that unpacks a software installation program (Setup Wizard) onto your local system (see Section 1.2.1 for instructions on downloading the setup file onto your local system). The second step includes running an installation wizard that installs the Cam Locator and M7CMS onto your local system.
To install or upgrade Microseven software, perform the following steps:
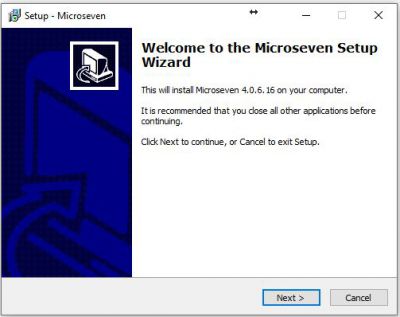
1. Go to the download folder on your local system and locate the setup file (*.exe file (Windows) or *.dmg file (Mac)). Double-click the setup file to open the Setup Wizard.
2. Click the ‘Next’ button to continue.
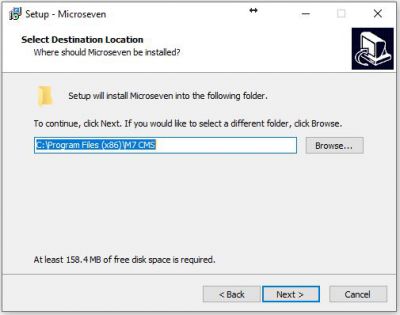
3. Accept the default location or choose another location for the installation of Microseven software. Click ‘Next’ to continue.
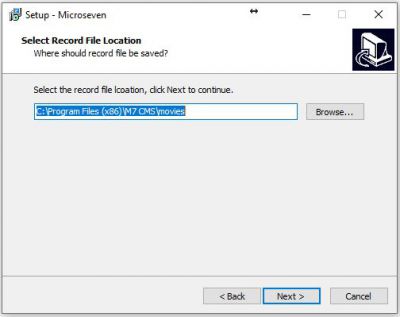
4. Accept the default location or choose another location for the storage of record and snapshot files. Click ‘Next’ to continue.
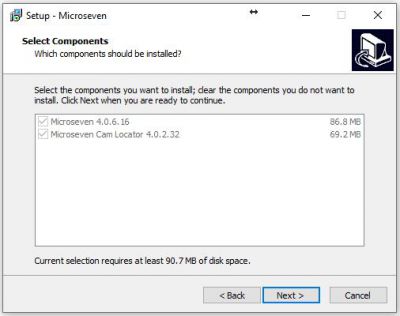
5. By default, both software components are selected. Click ‘Next’ to continue.
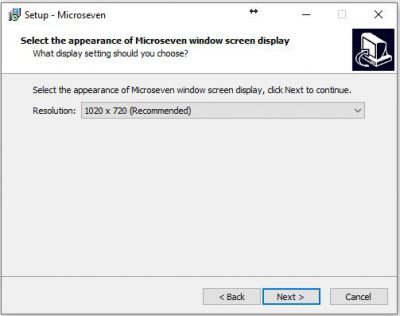
6. Choose the display resolution. Click ‘Next’ to continue.
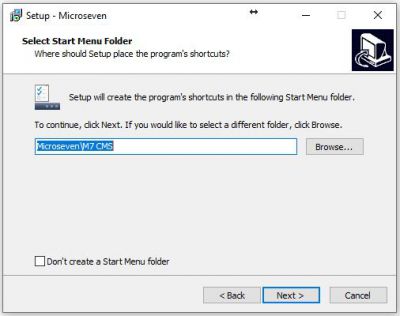
7. Select the default location or specify a different location for the Start Menu folder. Click ‘Next’.
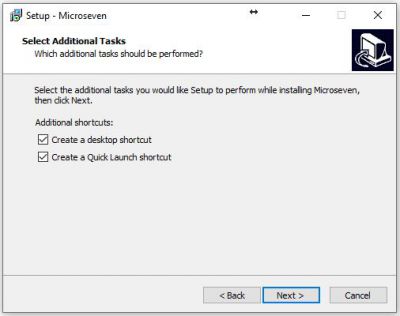
8. Setup installs a Cam Locator icon and M7CMS launch icon on your desktop by default. Uncheck any icon you don’t want installed on your desktop. Click ‘Next’ to continue.
Upgrading the Camera Firmware
This section describes how to upgrade the Microseven camera firmware using the setup file downloaded onto your local system (see Section 1.2.1).
1. Power on the camera using the provided power supply and connect an Ethernet cable between the camera and your router. Wait at least 60 seconds before beginning the set up to allow full enablement of the hardware and network recognition.
2. Click the Cam Locator desktop icon to open the Microseven Cam Locator window.
3. Select the camera you wish to configure and click the ‘Network Setup’ button to open the Camera Setup window.
4. On the Camera Setup window, click ‘Browse’ to open a browse menu and select the appropriate “*.pkg” file.
5. Click ‘Open’ to transfer the “*.pkg” file name to the “Firmware” field of the Camera Setup dialog window.
6. Click the ‘Upgrade’ button on the Camera Setup dialog.
7. After the firmware is successfully upgraded, a confirmation window appears.
8. Click ‘OK’ to close the window.
Initial Camera Setup
Using the Cam Locator
The Microseven Cam Locator searches the local network for cameras and devices supporting multicast traffic.
1. Make sure the camera(s) are powered up and connected to the local network with a standard Cat5e Ethernet cable between the camera and your router. Allow one minute (60 seconds) before beginning the setup process in order to fully enable the camera's hardware and allow it to be recognized by your network.
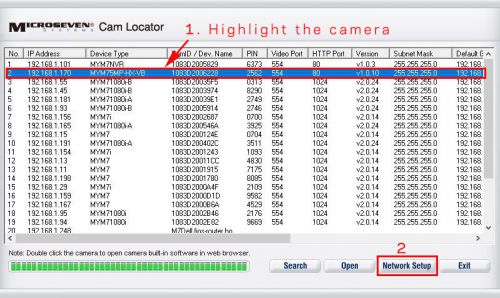
2. Click the Cam Locator desktop icon
to open the Microseven Cam Locator. Highlight the desired camera from the list and click the ‘Network Setup’ button to bring up the Camera Setup window.
Note: If a network camera does not appear in the Cam Locator, confirm the camera's power adapter and Ethernet cable are properly connected. Click the ‘Search’ button again to find your camera.
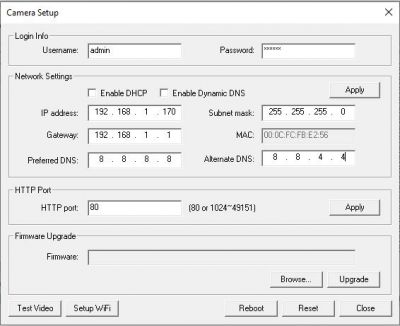
The following table contains instructions on establishing initial camera settings including Login Info, Network Settings, HTTP Port, Firmware Upgrade, Test Video, and Setup WiFi settings found on the “Camera Setup” menu.
| Section | Description |
|---|---|
| Login Info | |
| Username, Password | The Login Info section at the top of the Camera Setup window displays Username and Password fields. The default username is “admin” and the default password is “password”. |
| Network Settings | |
| Enable DHCP
IP address Subnet Mask Gateway Enable Dynamic DNS Preferred DNS Alternate DNS MAC |
Network settings will use either a dynamic or static IP addressing protocol.
Dynamic IP address (default): DHCP-enabled routers dynamically assign an IP address, subnet mask, and default gateway camera parameters. By default, the DHCP server typically accommodates dynamic DNS operations. If needed, the Preferred DNS and Alternate DNS information can usually be found within the router's setup pages or within the modem's configuration established by your ISP.
Static IP address: For implementations using a static IP protocol:
The MAC address is displayed for informational purposes and is not editable from the Network Settings menu. |
| HTTP Port | The HTTP port is set to 80 by default. You may customize the HTTP port to equal a standalone number or a number within the range of 0 to 49151 (0~49151). Click ‘Apply’ to save the settings, then allow 60 seconds for the camera to restart. To confirm the changes were accepted, go back to the Cam Locator's main page, click ‘Search’ and review the displayed settings. |
| Firmware Upgrade | See Section 1.2.3 for instructions on upgrading the camera firmware. |
| Test Video | The Test Video function provides a quick way to check if the camera’s network settings were successfully established for video display. With a successful network configuration, a web browser displays the camera’s live video after clicking the ‘Test Video’ button found on the bottom of the Camera Setup window.
Troubleshooting tip: If the video test fails with the error message “Fail to connect to camera. Check network and firewall settings”, check your Antivirus software settings and add the camera IP address to a list of exceptions where the antivirus software overlooks the IP camera(s) during virus scanning and protection operations. |
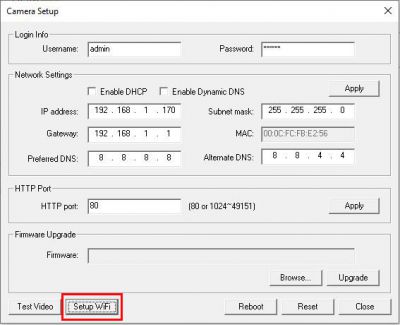
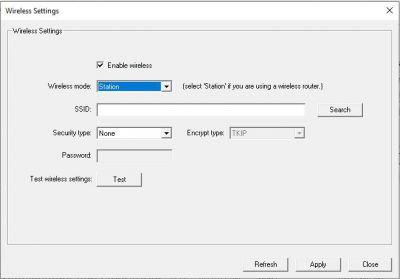
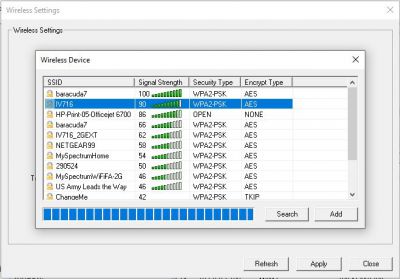
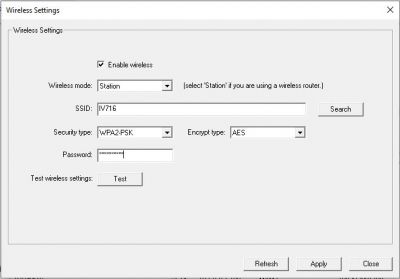
| Setup WiFi | Click the ‘Setup WiFi’ button found at the bottom of the Camera Setup window to bring up a Wireless Settings window.
Initially, the Wireless Settings window displays a single item, the ‘Enable wireless’ checkbox. Check the ‘Enable wireless’ box to display SSID, Network type, Security type, Encrypt type, and Password fields and a ‘Test wireless settings’ button on the window. Click the ‘Search’ button next to the SSID field to bring up a Wireless Device window.Click the ‘Search’ button next to the SSID field to see a list of available devices broadcasting their SSID. Select the device of your choice and click ‘Add’.On the Wireless Settings window, the SSID, Network type, Security type, and Encrypt type fields should now be populated from the router’s information. Enter your Wi-Fi password into the Password field. Click ‘Test’ to test whether a Wi-Fi connection was successfully established. Click ‘Apply’ to save all settings.Test your camera’s WiFi network connection by disconnecting the Ethernet cable. Wait for about 60 seconds, use the Cam Locator to find the camera with a WiFi connection. |
